- Introduction
- 1. Small Portable Islands on Wheels
- 2. Kitchen Islands made from Furniture
- 3. Rustic-Looking Kitchen Islands
- 4. Kitchen Islands made from a Vintage Table
- 5. Small Islands with Classic Butcher-Block Countertops
- 6. Small Wooden Kitchen Islands
- 7. Vintage Kitchen Island Designs
- 8. Small Painted Kitchen Islands
- 9. Metal Moveable Kitchen Islands
- 10. Do-it-Yourself Kitchen Island made from Kitchen Cabinets
Introduction
Your home will be probably be the largest purchase and investment you’ll make in life. Making small subtle changes and upgrades in your kitchen makes a whole lot of sense because kitchens and baths bring the most value for your money when making upgrades. Smaller kitchens usually wont have the room for a full kitchen table, therefore a small freestanding kitchen island with seating for a couple of people works really well.
Not everyone has the luxury of living in a house or townhouse with a large kitchen. Every inch of counter space and available seating comes at a premium.
Kitchen Islands can act as your gateway to an informal dining area, giving you additional seating, a workspace, pullout features such as a trash can drawer, and storage for pots, pans, books, and other kitchen accessories.
But what if you’re dealing with a small kitchen and clearances are an issue?
Keep reading and I’ll give you 9 small island ideas, with some of them being moveable, and as a bonus, I’ll show you how we added a moveable kitchen island that was secured for safety in the last renovation we performed.
1. Small Portable Islands on Wheels
Sizing up your kitchen island requires some critical thought. For instance, the distance between the cabinets and the kitchen island should allow for proper working space and access to appliances.
A single-cook aisle should be at least 42 inches wide.
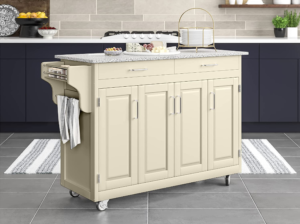
This is where the White 4 Door Cabinet with Gray Granite Top pictured can solve your space problem.
Whether it’s painted or stained and configured with a natural, black, wood, or gray granite top there is sure to be a material and color to match your kitchen decor.
A small moveable island on wheels can provide a great area for food preparation and additional storage. When needed the island can be moved out of the way. Some models even have folding leaves to allow for eating.
2. Kitchen Islands made from Furniture
With the many sources for buying used furniture nowadays this is a great option for finding a unique piece and creating your kitchen island.
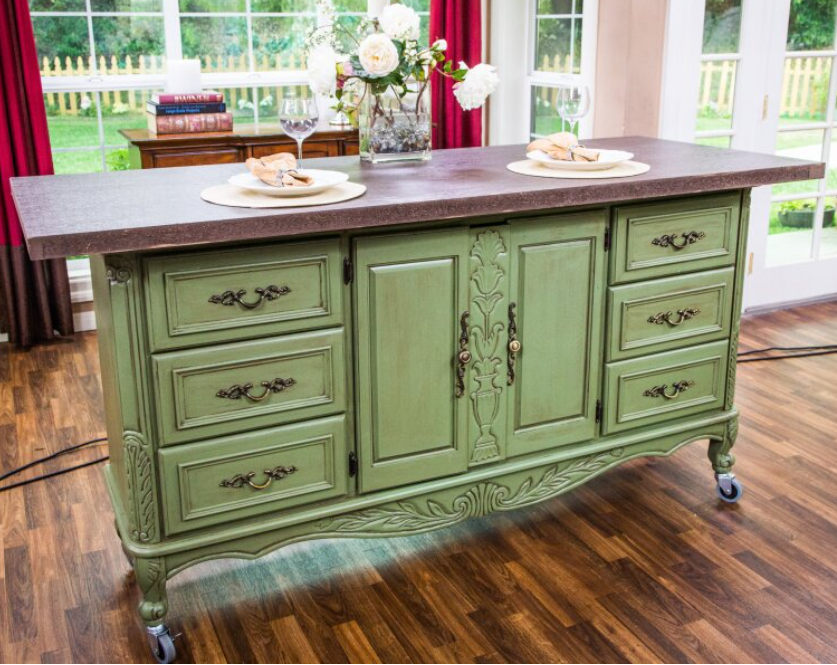
One of the easiest ways to create a custom island is to use an old repurposed dresser like the one the designer used below. He purchased this old dresser and then chose a unique custom top, and painted it to match the kitchen decor.
Customizing the top with a countertop purchased from your local home improvement store this dresser-turned-kitchen island will be durable and provide a great workspace. You could use one of the more durable stone, granite, or man-made surfaces.
Consignment shops, flea markets, online marketplaces, garage sales, estate sales, and any other place with used furniture are great places to look for unusual pieces that can be used for your island. Remember most areas have some type of salvage construction material warehouse where you might be able to source a cool butcher block, quartz, granite, or laminate top for your project.
3. Rustic-Looking Kitchen Islands
I know when I think of the word “Rustic” the first thing that comes to my mind is an old cabin in the woods, somewhere where Daniel Boone might have grown up. Old wooden floors, large wooden logs framing the shape, and a large table made from timber cut off the property.
Why is all this important, well it tells us our rustic kitchen island will probably be made from old salvaged wood or some other old material such as stone or homemade brick.
Using an antique piece, we can create a unique kitchen island.
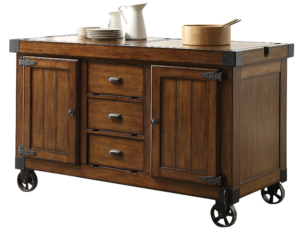
Of course, the price may be more than our budget and we might have to purchasing a new Rustic Kitchen Island such as the one here.
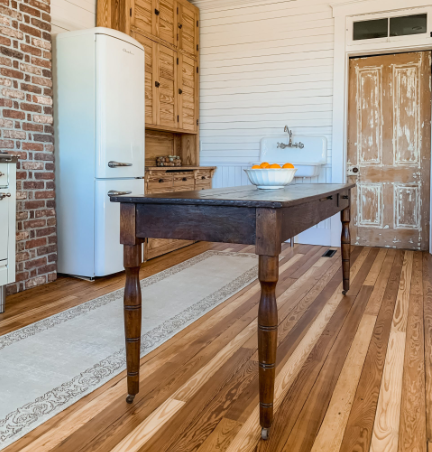
4. Kitchen Islands made from a Vintage Table
Kitchen islands made from vintage tables can be a great addition to any home decor. Here are some ideas how to turn a vintage table into a kitchen island:
Choose a vintage table that’s sturdy and has a flat surface or where a new top can easily be adapted. It should also be the right size for your kitchen space. Having drawers for storage can be a bonus, but it is not essential.
Remove any legs, hardware, or any other attachments that can obstruct the base. Sand or soda blast the surface of the table to remove any rough patches or old paint or stain.
Measure and mark where the legs will be placed on the underside of the table. You can either sand and attach the original legs, attach pre-made legs or make legs from wood. Secure the legs by attaching them to the underside of the table using screws or bolts. If you are making legs from wood, ensure that they are sturdy enough to support the weight of the table.
You can add a butcher block top so the kitchen island can be used for food preparation. Measure and cut the butcher block to fit the top of the vintage table. Secure it with screws or bolts from underneath.
Adding paint or stain to match the decor of your kitchen will put the finishing touches on the island. You can also add hooks or shelves for extra storage.
Once the kitchen island is complete, install it in your kitchen. It can be a great focal point in the room and provide extra counter space for food preparation and storage. Adding antique casters can allow for moving the island, make sure you account for the increase in height added by the wheels.
Overall, turning a vintage table into a kitchen island can be a fun and creative project that adds a unique touch to your kitchen space.
5. Small Islands with Classic Butcher-Block Countertops
Small kitchen islands with classic butcher-block countertops are a great addition to any kitchen. Not only do they add extra counter space, but they also provide a warm and inviting feel that is perfect for gathering around with family and friends.
When it comes to choosing the right butcher-block countertop, there are a few things to consider. First, you’ll want to choose a wood that is durable and can withstand the wear and tear of daily use. Maple and oak are both great options that are known for their strength and durability. There are pros and cons for using a butcher-block for your kitchen countertop or on your kitchen island.
Next, you’ll want to consider the finish of the countertop. Some people prefer a natural, unfinished look, while others prefer a more polished, glossy finish. It’s important to choose a finish that matches the overall aesthetic of your kitchen.
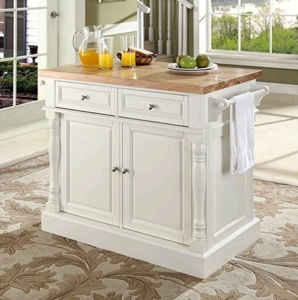
Finally, you’ll want to consider the size and shape of the island. The Pemberly Row Kitchen Island Butcher Block in White above is a great option for a small compact kitchen island with storage. If you have a larger kitchen, you may want to consider a larger island that can serve as a focal point in the room and offer more seating capacity.
In conclusion, portable kitchen islands come in a plethora of styles and prices which vary from retailer to retailer, so no matter what your style you choose a small kitchen island with a classic butcher-block countertop can be a great addition to any home decor. So why not add one to your kitchen today?
6. Small Wooden Kitchen Islands
Small wooden kitchen islands are a popular and practical addition to many kitchens. They offer additional counter space, and storage, as well as being used for a dining area. There are many different types of wooden kitchen islands, each with its own unique features and benefits.
One popular type of wooden kitchen island is the butcher block island. These islands feature a thick, sturdy wooden top that is perfect for chopping, slicing, and dicing. They are also great for kneading dough, rolling out pastry, and other kitchen tasks that require a sturdy work surface.
Another popular type of wooden kitchen island is the rolling cart. These islands are typically smaller and more mobile than butcher block islands, making them ideal for smaller kitchens or for those who like to rearrange their kitchen layout frequently. Rolling carts can be used for additional counter space, as a serving cart, or even as a bar cart when entertaining guests.
For those who prefer a more rustic or traditional look, a wooden farmhouse kitchen island can be a great choice.
These islands often feature a distressed or weathered finish, giving them a warm and inviting feel.
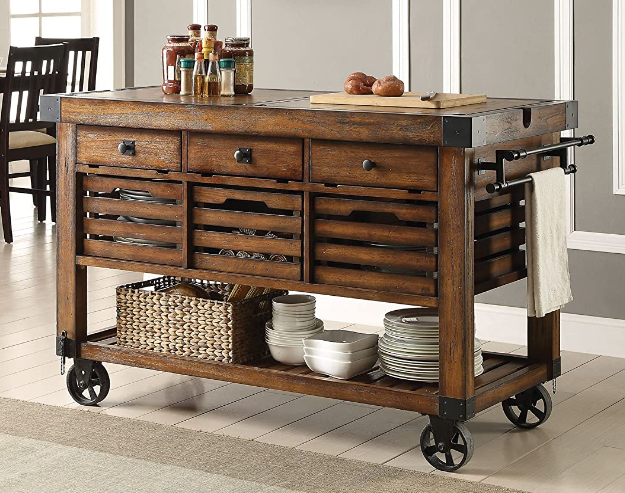
They are also great for storing pots, pans, and other kitchen essentials. One such island is the ACME Furniture Kitchen Cart (pictured) made from Distress Chestnut wood with with vintage rolling casters.
No matter what type of wooden kitchen island you choose, it’s important to consider the size and layout of your kitchen before making a purchase. You’ll want to make sure that your island fits comfortably in your space and that it doesn’t impede traffic flow.
In conclusion, small wooden kitchen islands are a versatile and practical addition to any kitchen. Whether you choose a butcher block island, a rolling cart, or a farmhouse-style island, you’re sure to enjoy the extra counter space and storage that it provides.
7. Vintage Kitchen Island Designs
Vintage kitchen island designs are a great way to add character and charm to your kitchen. There are many different styles and types of vintage kitchen islands to choose from, each with unique features and benefits.
One popular type of vintage kitchen island is the farmhouse-style island. These islands typically feature a distressed or weathered finish, giving them a rustic and timeless feel. They often include features such as open shelving, drawers, and cabinets, providing ample storage space for all of your kitchen essentials.
Another popular type of vintage kitchen island is the industrial-style island. These islands feature materials such as metal, wood, and brick, giving them a raw and edgy look. They often include features such as exposed pipes, gears, and other industrial elements, adding to their unique character.
For those who prefer a more traditional or elegant look, a vintage kitchen island with a marble top can be a great choice. These islands often feature ornate details such as carved legs and decorative molding, giving them a sophisticated and timeless feel.
No matter what type of vintage kitchen island you choose, it’s important to consider the size and layout of your kitchen before making a purchase. You’ll want to make sure that your island fits comfortably in your space and that it complements the overall aesthetic of your kitchen.
In conclusion, vintage kitchen island designs are a great way to add style and functionality to your kitchen. Whether you choose a farmhouse-style island, an industrial-style island, or a traditional island with a marble top, you’re sure to enjoy the added storage and counter space that it provides.
8. Small Painted Kitchen Islands
Small painted kitchen islands are a great way to add a pop of color and personality to your kitchen. They offer additional counter space, storage, and can serve as a focal point in your kitchen.
One popular type of painted kitchen island is the vintage-style island. These islands often feature a distressed or weathered finish, giving them a rustic and charming feel. The paint is often applied in layers to create a textured, aged look. They are great for storing pots, pans, and other kitchen essentials. Island paint color ideas are a fabulous way to bring personality to your kitchen area, allowing you to stamp your individual style on the space.
Another popular type of painted kitchen island is the modern-style island. These islands often feature bold and bright colors, giving them a contemporary and playful feel. They are great for adding a splash of color to your kitchen and can be used for additional counter space or as a dining area.
For those who prefer a more traditional or elegant look, a painted kitchen island with a wooden top can be a great choice. These islands often feature ornate details such as carved legs and decorative molding, giving them a sophisticated and timeless feel. The paint can be applied in a subtle, muted color to complement the natural beauty of the wood.
No matter what type of painted kitchen island you choose, it’s important to consider the size and layout of your kitchen before making a purchase. You’ll want to make sure that your island fits comfortably in your space and that it complements the overall aesthetic of your kitchen.
In conclusion, small painted kitchen islands are a versatile and fun addition to any kitchen. Whether you choose a vintage-style island, a modern-style island, or a traditional island with a painted finish, you’re sure to enjoy the extra counter space and storage that it provides, as well as the added style and personality that it brings to your kitchen.
9. Metal Moveable Kitchen Islands
Metal movable kitchen islands are a great option for those who want a versatile and durable addition to their kitchen. Metal islands offer a sleek and modern look, and their mobility makes them great for small kitchens or for those who like to rearrange their space often.
One popular type of metal movable kitchen island is the stainless steel island. Stainless steel is a popular material for kitchen appliances and fixtures because of its durability and resistance to corrosion. Stainless steel islands are easy to clean and maintain, making them a great choice for busy kitchens.
Another popular type of metal movable kitchen island is the industrial-style island. These islands often feature metal pipes, gears, and other industrial elements, giving them a raw and edgy look. They are great for adding character and personality to your kitchen.
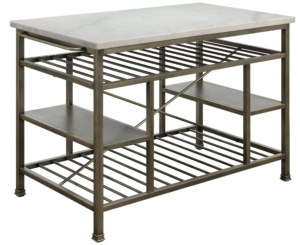
For those who prefer a more traditional or elegant look, a metal movable kitchen island with a marble top can be a great choice. These islands often feature a metal frame with a polished marble top, giving them a sophisticated and luxurious feel. They are great for serving food or as a dining area.
No matter what type of metal movable kitchen island you choose, it’s important to consider the size and layout of your kitchen before making a purchase. You’ll want to make sure that your island fits comfortably in your space and that it complements the overall aesthetic of your kitchen.
In conclusion, metal movable kitchen islands are a great choice for those who want a durable, versatile, and stylish addition to their kitchen.
Whether you choose a stainless steel island, an industrial-style island, or a metal island with a marble top, you’re sure to enjoy the extra counter space and mobility that it provides.
10. Do-it-Yourself Kitchen Island made from Kitchen Cabinets
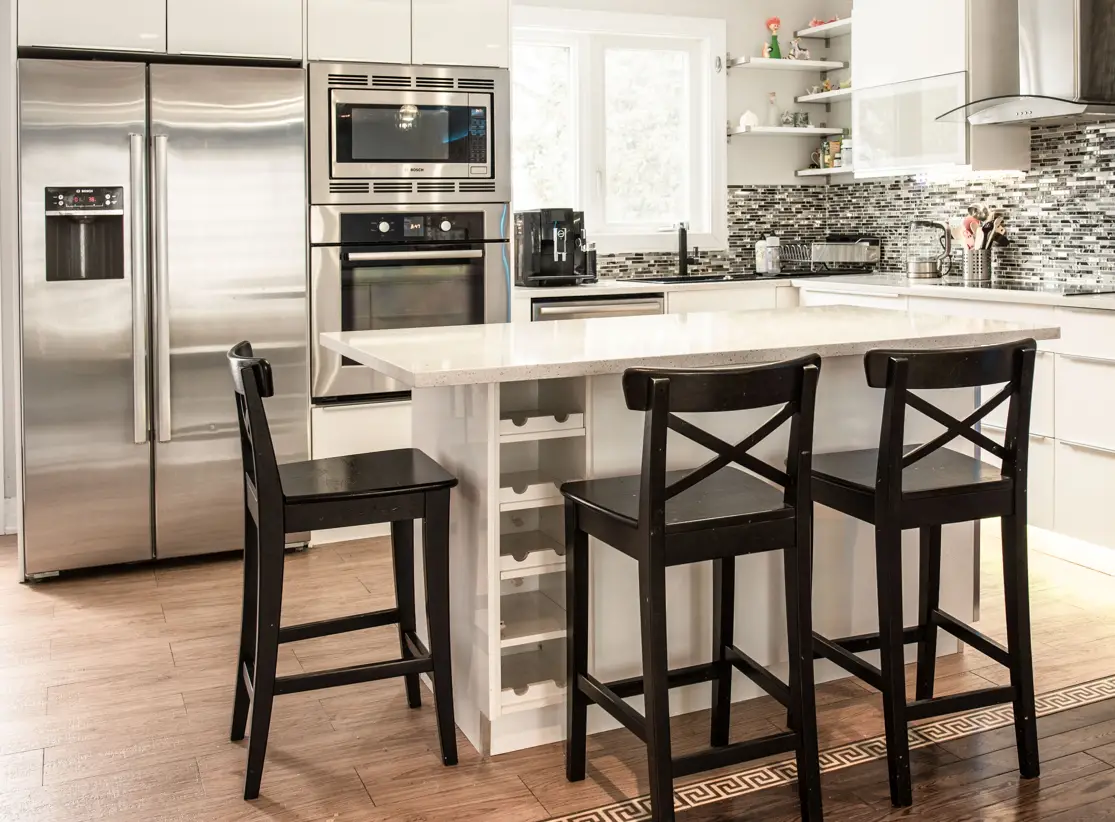
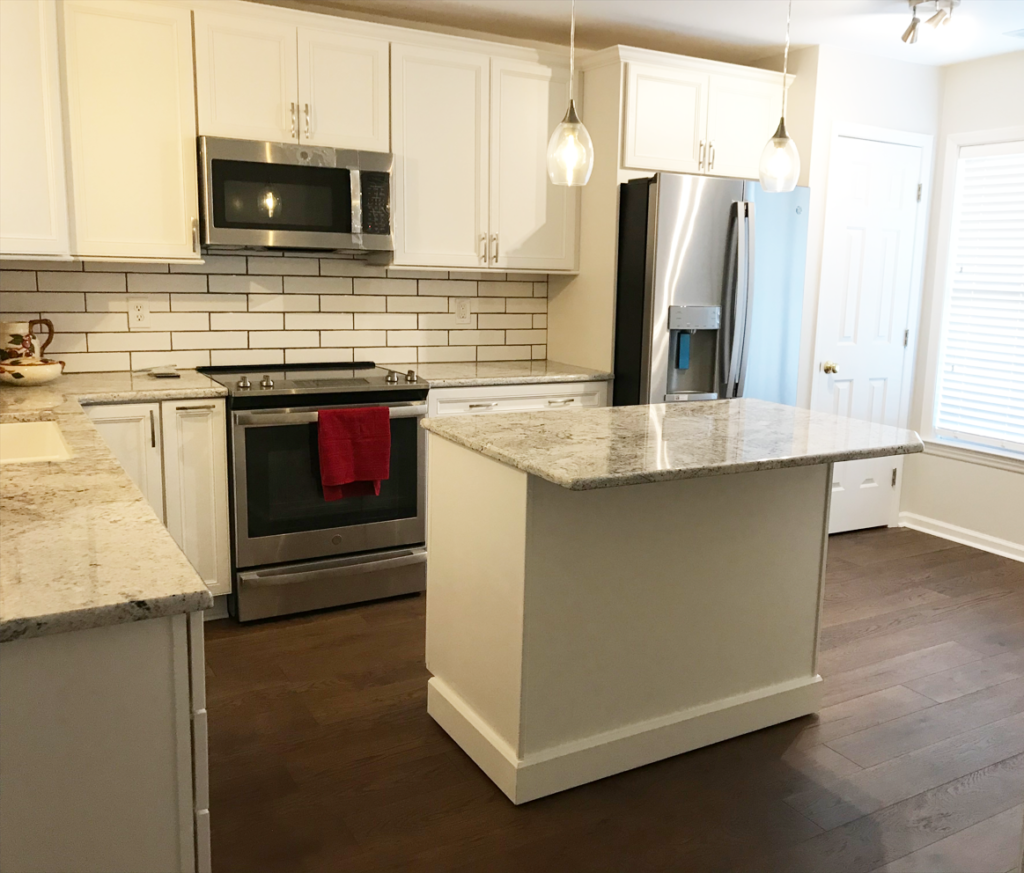
In a recent renovation, we had the opportunity to build a small moveable kitchen island using a couple standard kitchen cabinets and securing it to the floor using the anti-tip brackets normally found under a cooking range.
Since the kitchen island would have a 10” Granite overhang used for seating for three, we felt the island needed to be secured to the floor so tipping would not be possible.
Note: Check your local codes as some require that an electrical outlet be installed on a fixed non-moveable island.
The Finished Island:
Modifying the Cabinets
Our team chose to use standard manufactured kitchen cabinets from Lowes Home Improvements which matched the style and color used in the kitchen renovation.
There was a limited amount of kitchen space for moving appliances in and out which made it difficult for a more permanent kitchen island option.
We decided to build a small moveable kitchen island that would accommodate seating at a small bar. Three seats can be accommodated at our island by the granite overhang.
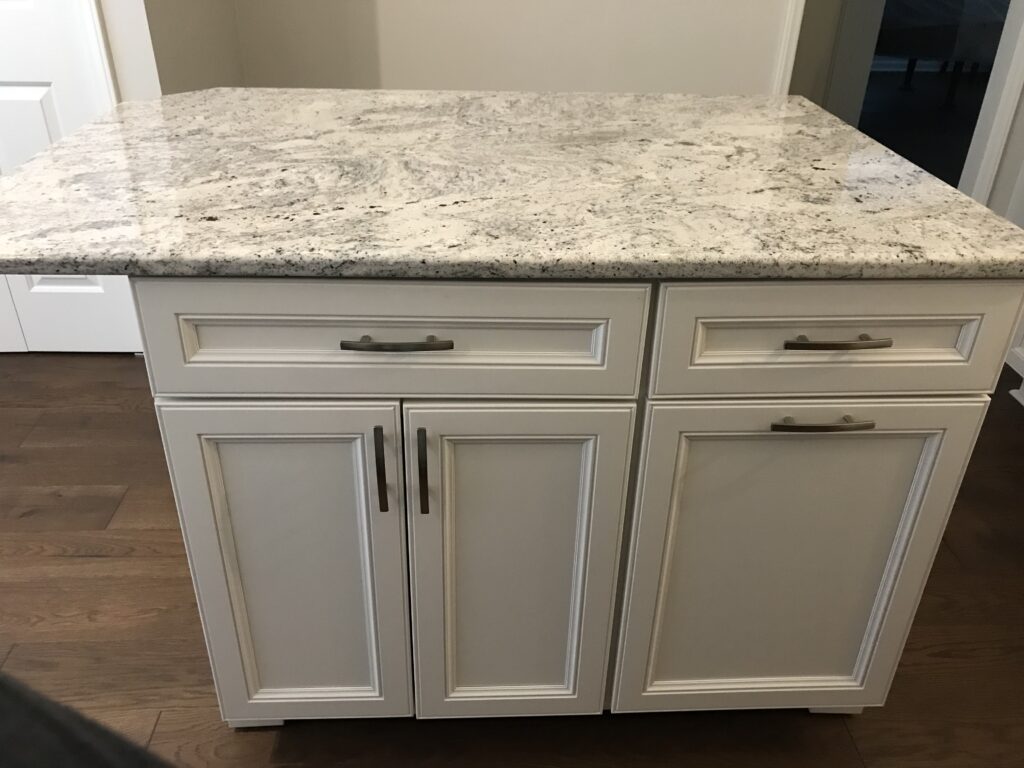
The 18-inch cabinet below on the right bottom is a drawer to accommodate trash cans, and the 24-inch bottom cabinet on the left is a pots and pans storage cabinet for a total of 42”. Both cabinets have drawers on top for storage.
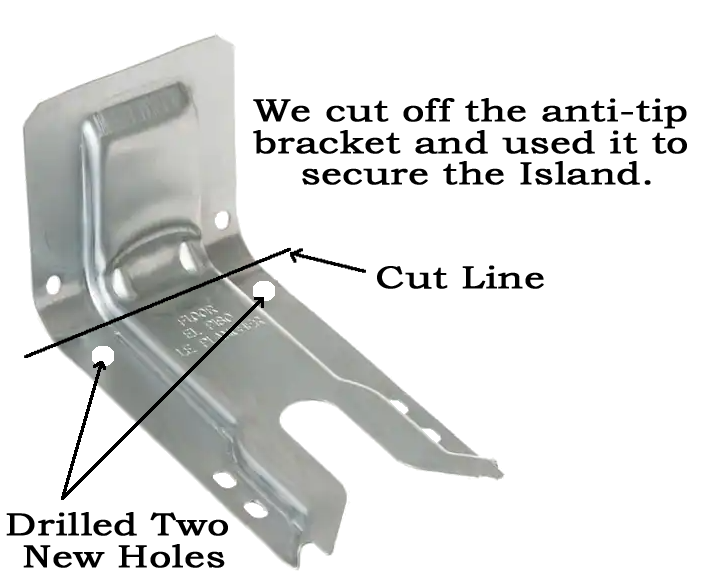
In order to secure the cabinet with the heavy Granite on top we used a normal anti-tip bracket (shown here below) which is usually used for securing a cooking range.
The two brackets were used on the front side of the cabinet, the front leveling feet were slipped in the slot, and they were mounted to the floor with (4) Vestill bolts in each bracket. We cut off the back of the bracket and drilled two new holes as described in the picture above.
Before we mounted the two cabinets together, rolling casters and leveling feet were added to the underneath.
We used multiple leveling feet with hex-head adjustments. Holes were made in the cabinet bottoms so the feet could be adjusted to lift the cabinet off the casters providing for a more stable island.
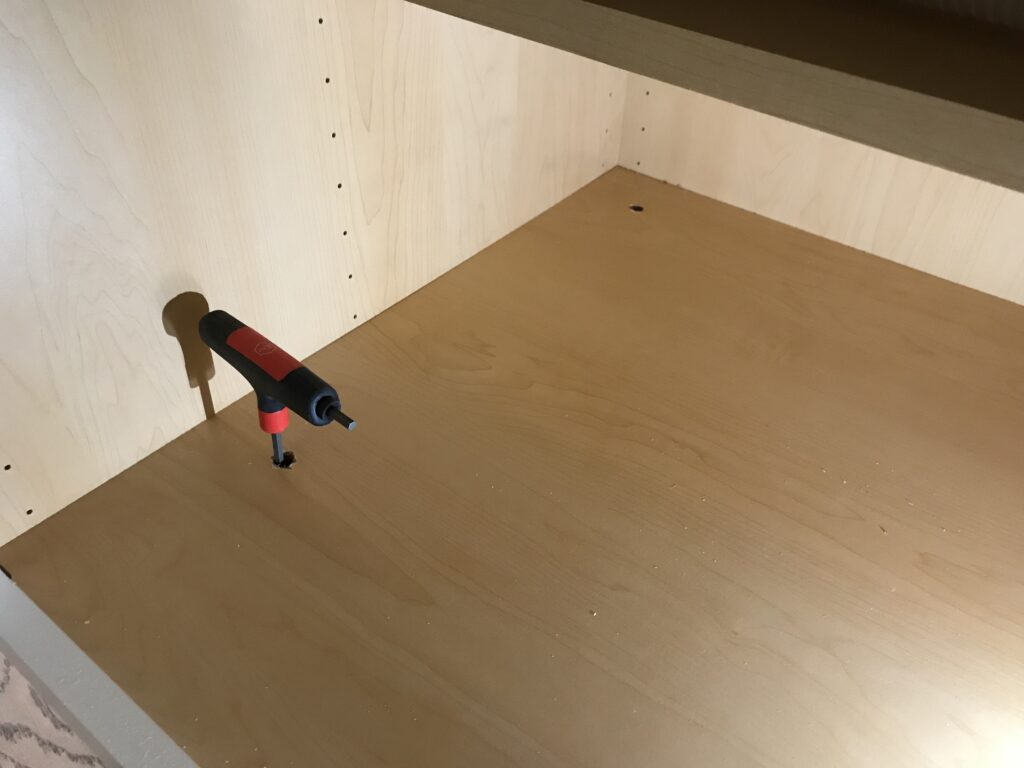
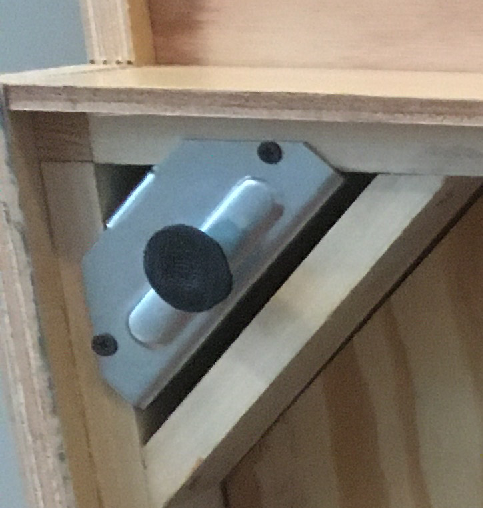
Once the feet were mounded underneath the cabinet, we could unscrew each feet to drill a straight hole up from the bottom into the cabinet shelf to align with the hex-head feet leveling screw.
The picture on the left with the wrench passing through the hole in the cabinet bottom shows making adjustments to the leveling foot lifting the cabinet off the casters.
Building out the underneath of the Cabinets
In order to build the underneath of the cabinets up so the casters were sticking approximately 1/8” out the bottom side we built an inside level on the bottom of the cabinets.
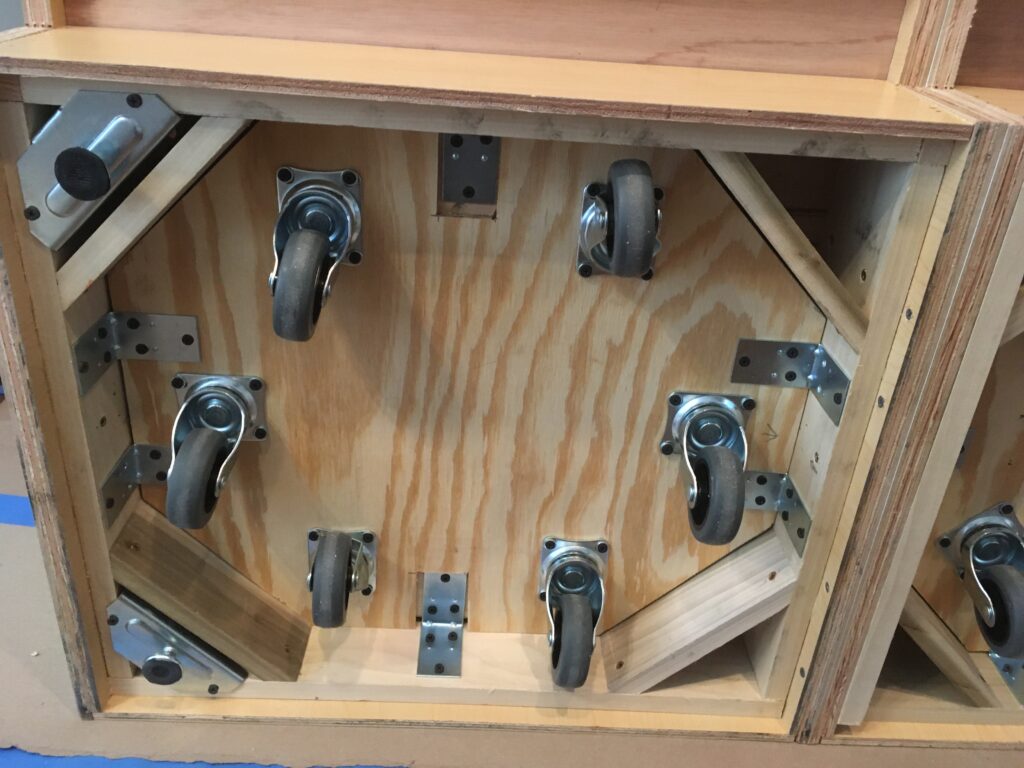
Using plywood and brackets we developed a bottom that could be adjusted allowing the casters to lift the cabinet off the floor for movement but staying underneath the cabinets hidden. As you can see in the picture of the larger cabinet there are 6 casters, and not shown here, In the smaller cabinet there are 4 casters.
In this picture each outside end had 2 leveling feet to raise the cabinet up off the casters for stabilization. From inside through holes in the cabinet shelving leveling feet can be adjusted, lifting the cabinet off the casters using a hex-head wrench. Below with the cabinets were aligned for the same height, and then bolted together as one unit.
Conclusion
As you can see from the picture above the underneath of the cabinets were built out with additional structure and plywood for support. This may have been overkill, but we wanted the structure to be able to support the additional weight of the granite and as well as any items stored in the cabinets.
The brackets mounted to the plywood allowed for adjustments to get the cabinets on the casters as close to the floor without dragging on the floor when moved. Finding casters that were the right height for the underneath was impossible without making the cabinet higher off the floor. We wanted the cabinet to appear on the floor but movable. The cabinet is about 1/8 inch off the floor when raised on the leveling feet, and slightly less than that when on the casters. Over a couple of week-ends you too could have a movable kitchen island.

