
Do you have a new extension in your house that needs some nice new light fixtures? Or perhaps a fancy ceiling light you want to show off in the living room? More importantly, do you want to do all the handiwork by yourself? Well, you came to the right place to learn about the basics of switch wiring! Today, we’ll talk about 3 types of light switch wiring: one-way switch, 3-way switch, and 4-way switch.
More...
Wiring your light switches sounds like a headache for another person (a professional electrician, to be more specific), but it can become a simple task when some groundwork is laid out for you, as what I am going to do for this article.
Just a bit of backstory on why I put this article together: there’s a light switch that’s gone loose in one of my downstairs bathrooms. I’ve ignored it for the longest time even though the wires were exposed, until one day, the light stopped working completely (So I recommend that you never ignore exposed wiring). The wiring got damaged and I had to replace them to get the light working again.

Some of you may have done the same silly thing as I did and/or looking for repair how-tos, or you may be looking for a way to install some new lights in your house by yourself. In any case, you’ve found the right article!
Let me tell you firsthand that wiring your switches isn’t that complicated when you have the proper tools and some patience. In fact, it’s a pretty basic DIY project for your home. However, if you’re not feeling confident, seek professional help for your first time with wiring.If you are in the market for superclone Replica Rolex , Super Clone Rolex is the place to go! The largest collection of fake Rolex watches online!
Parts of a Switch
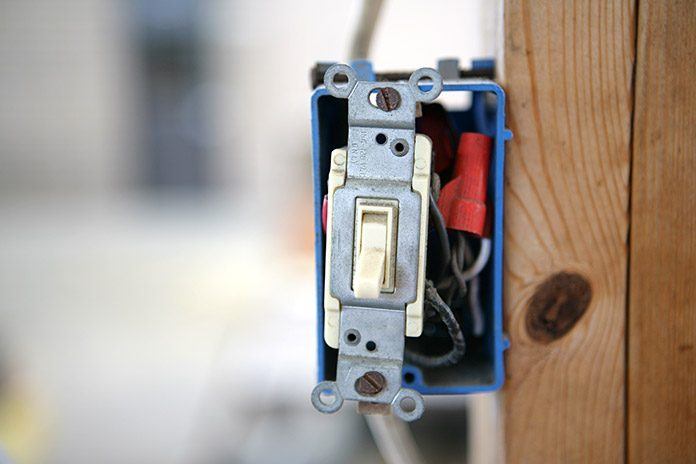
Before anything else, it’s best to get acquainted with your project first. Knowing the parts and pieces can help the beginners be familiar with what they’re going to deal with and hopefully avoid any mishaps. Open up your switch box and observe.

Via DIYadvice
1. Ground wire (bare)
A ground wire serves to protect you from electric shock through maintaining the voltage in the circuit as well as causing the circuit breaker to trip when a high voltage is present.
2. Hot wire (BLACK)
The hot wire is the path of voltage from the power source to your lights.
3. Neutral wire (WHITE)
The neutral wire connects to the source as well as the ground.
4. Traveler wires
The traveler wires connect your switches together in a multiple-switch system. These are usually red in color.
5. Power source
This is the source of your electricity and can be connected to your switch through a feeder wire.
6. Wire nuts
These are also known as twist-on wire connecters and serve to fasten two or more wires.
Pro tip
If you’re not thoroughly familiar with which wires are which, take the time to label them. Better safe than sorry!
Pole Switches
Moreover, we have two types of switches: we have a double pole switch and the single pole switch. There is only one simple difference: a single pole switch controls only one circuit, while a double pole switch controls two separate circuits.
How to Wire a One-Way Switch
The simplest switch to wire is a one-way switch. One-way switches are commonly used for bathrooms, small rooms, and short hallways, wherein you only put one switch in the room. A one-way switch can be attached to many lights, but can only be turned on and off with one switch.
If you are a beginner, I suggest trying a basic one-way light switch at first. This article will teach you how to install a one-way light switch in detail.
IMPORTANT!
Before tinkering with your lights, or any other electrical appliance for that matter, disconnect it from power. Now, what you want to do is connecting all the pieces together and there are two cases for that: you can either install a switch by connecting power to the switch from a source or connecting power from the lights to another switch.
Let’s discuss the process in summary: When you are connecting power to the switch from the source, you are going to connect the ground wires to the box. Then, you will twist the white neutral wires together and put on a wire nut. The two black wires you have will go to the two terminals at the top and bottom of the box (this will connect the light to the power source).

On the other hand, an easier option is to connect a switch from another light. To do this, hook up the ground wire, put the black wire on the bottom terminal, and the white neutral wire to the top terminal. And that’s it! Easy, right?
Pro tip
Use electrical tape to cover wire nuts and other wires to keep them in place.
How to Wire a 3-Way Switch
If you have lights in a large room or long hallway that you want to control with more than one switch, you may want to have a three-way switch. This is common for staircases and landings, medium-sized living rooms, bedrooms, and kitchens, and other types of rooms with multiple entrances. This type of switch allows you to turn your lights on and off from two points in the room.
Say, if you have a light switch beside your bedroom door and another near your bed, life will be easier, right?
- Note: Some people confuse 2-way switch and 3-way switch. You may be confused with 2-way switch and 2-pole switch. Remember: a 3-way switch has two switches, not the 2-way switch.
The same pattern goes with wiring two-way switches as in with one-way switches. The only difference is: you are connecting the wires in a way that the light will be controlled by two switches.
Like the basic one-way switch, you can connect the power from the light fixture to the light switch or connect the power to the light fixture from the light switch.

In summary, to connect the power from light fixture to the switch, connect the power source to the first switch by screwing in the hot wire into the black screw; tie the white and ground wires together, and then connect the remaining black and red wire to the traveler screws.
To connect the power from the light switch, connect the hot wire coming from the light fixture to the common screw of the 2nd switch. Tie the ground and white wires together. And again, connect the remaining black and red wires to the traveler screws.
Go to this link for more detailed instructions. And this site to explore more methods for 3-way switching.
How to Wire a 4-Way Switch
Now we go to the 4-way switch. This method is employed for large rooms and long hallways; basically any room that is too large for just one or two switches. Who wants to walk a long way just to turn off a light switch? No one. So use 4-way switch wiring to have 3 switches for your lights.
When installing a 4-way switch, you need to have an existing 3-way switch pair. Essentially, you are inserting another switch in between the two 3-way switches. To do this, you would have to cut the wire in between the two switches to make room for your third switch.

Then, you would have to connect one black wire and one red wire from the first switch onto your third switch; screw the black wire on the top terminal and the red wire on the other side, also on the top terminal.
Now, the black wire and red wire from the second switch will go on the bottom terminals, but the black wire will go on the same side as the first black wire, and same goes for the red one.
To add more switches to your circuit, just do the same method! Cut in between and connect your nth switch. Pretty easy stuff.
So, that’s it! I hope you learned a lot from this article. After all, wiring light switches is one of the basic skills a DIY-er or aspiring handyman needs to have. Not only does it come in handy when installing new lights, you can also employ the things you’ve learned to replace or repair a switch. Isn’t that neat?
VIDEO: How to Wire a Light Switch
Did you find this article helpful? Have you had any wiring experiences and/or problems that you’d like to share? Tell me in the comments below. And don’t forget to share this article if you liked it!